Logancee - Premium OpenCart Theme
- latest update: 03/17/2016
- by: Nine-Themes
Thank you for purchasing my theme. If you have any questions that are beyond the scope of this help file, please feel free to email via my user page contact form here. Thanks so much! Contact: http://themeforest.net/user/Nine-Themes
Installation
You can also see video tutorial, which show how to use the same modules like presented in this documentation:
GO TO VIDEO TUTORIAL
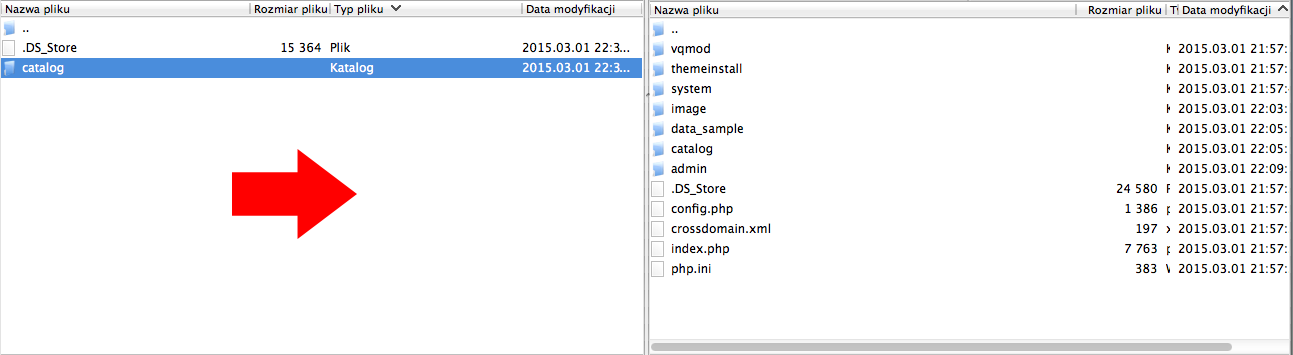
Upload files using your FTP Client (we recommend FileZilla) from our download package.
In Files to Upload is folder with version of OpenCart. Open it and there are six folders: "Admin", "Catalog", "Data_sample", "Image", "System", "Themeinstall", like in your installation directory:

You will be asked if you want to overwrite some of the files from your current installation. Overwrite all files.

After this you have to upload the content of the folder Extra skins in the same way.
Theme activation
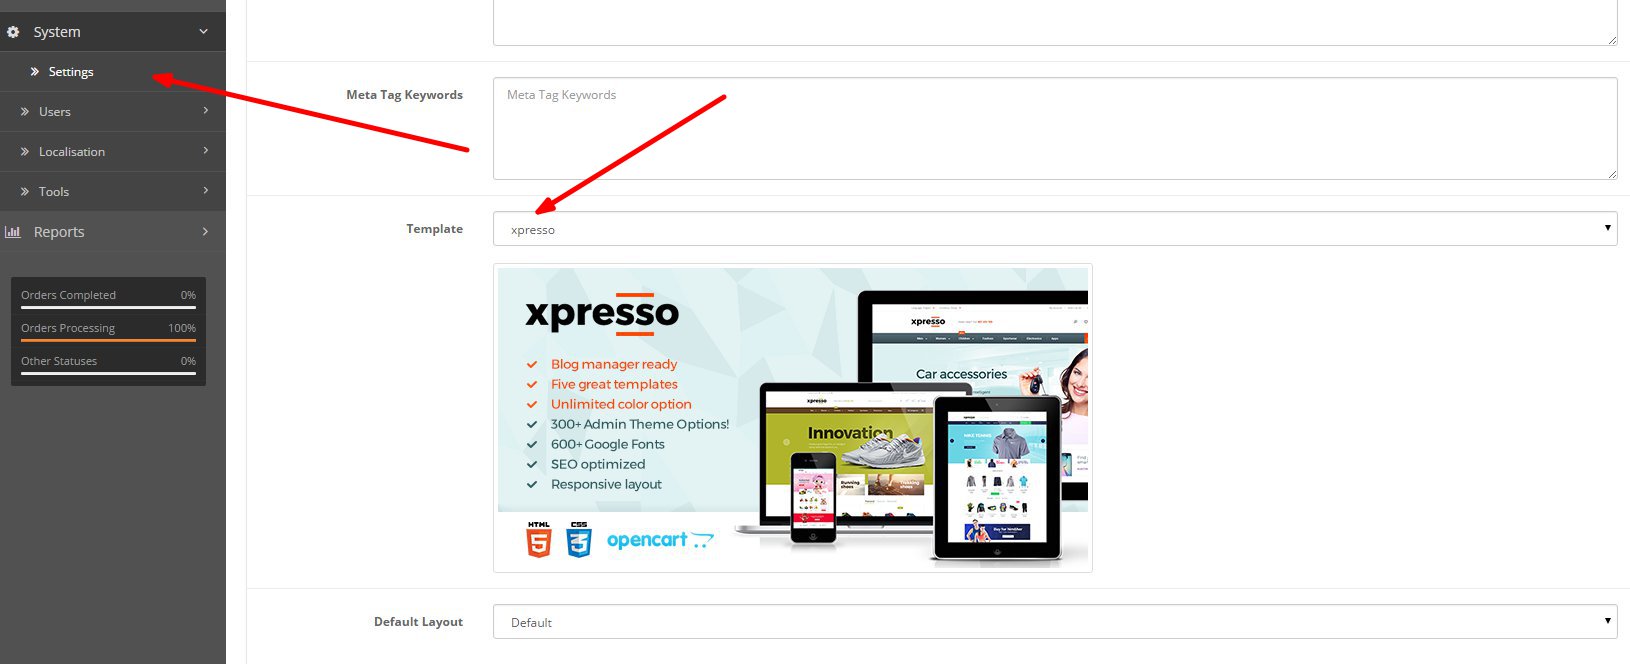
Go to OpenCart admin panel and activate the theme: System › Settings › Edit Store settings › Store tab › Template dropdown.
Theme install
Once you activate the Logancee template and go on the homepage of your shop you will be automatically redirected to the address:
themeinstall/index.php
You will be informed about the correct installation of the template and at this point you will be able to come back to the main page of your shop. However, if you are being redirected to the address themeinstall/index.php every time or if strange mistakes appear on your page, you will have to add a few lines code manually to your file index.php located in the main folder of the template.
How to do it:
Open the file system/framework.php and find the 38th line of the code. Add the following code in the place showed below:
Save changes and upload the modified file: index.php to the server.

Images size
With this theme you can set your own images size from admin panel. You don't need to edit CSS files.
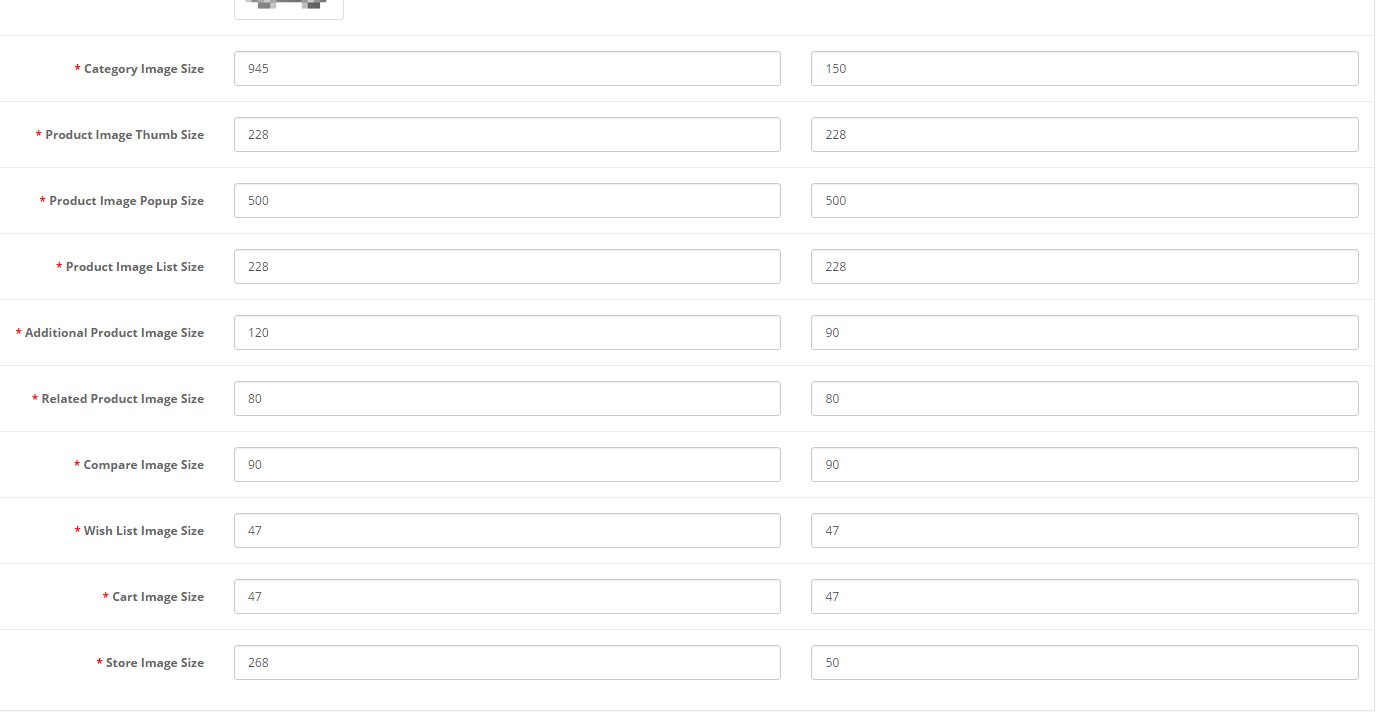
If you want to customize sizes, go to the OpenCart admin panel and set image size in: System › Settings › Edit Store settings › Image tab
For the best look we recommend size in demo admin panel.
Configuration
If you want your site to look exactly like the demo version, then this bookmark is made just for you. Make sure you have completed all steps described at the Installation section. Then sign in to your administration panel of opencart. After that, go to the bookmark Extensions -> Modules. You will see a few modules names (in bold). They are listed below:
- Advanced Grid
- Blog Category
- Blog Latest Posts
- Blog Management
- Blog Popular Posts
- Blog Popular Tags
- Blog Product Related Posts
- Blog Search
- Camera slider
- Carousel item
- Category Wall
- Cookie
- Custom Module
- FAQ
- Filter product
- Full screen background slider
- Header Notice
- Logancee theme options
- MegaMenu Manager Links
- MegaMenu
- Newsletter
- Popup
- Product blocks
- Product tabs
Next to each of module there is a add button, that you have to click to install the module. After install the module go to the edition of Logancee Theme Options. You should see the image presented below:

From the list choose the skin you are interested in and press the button: Active skin.
On the left side you can see a list of tabs, click the Install data tab.
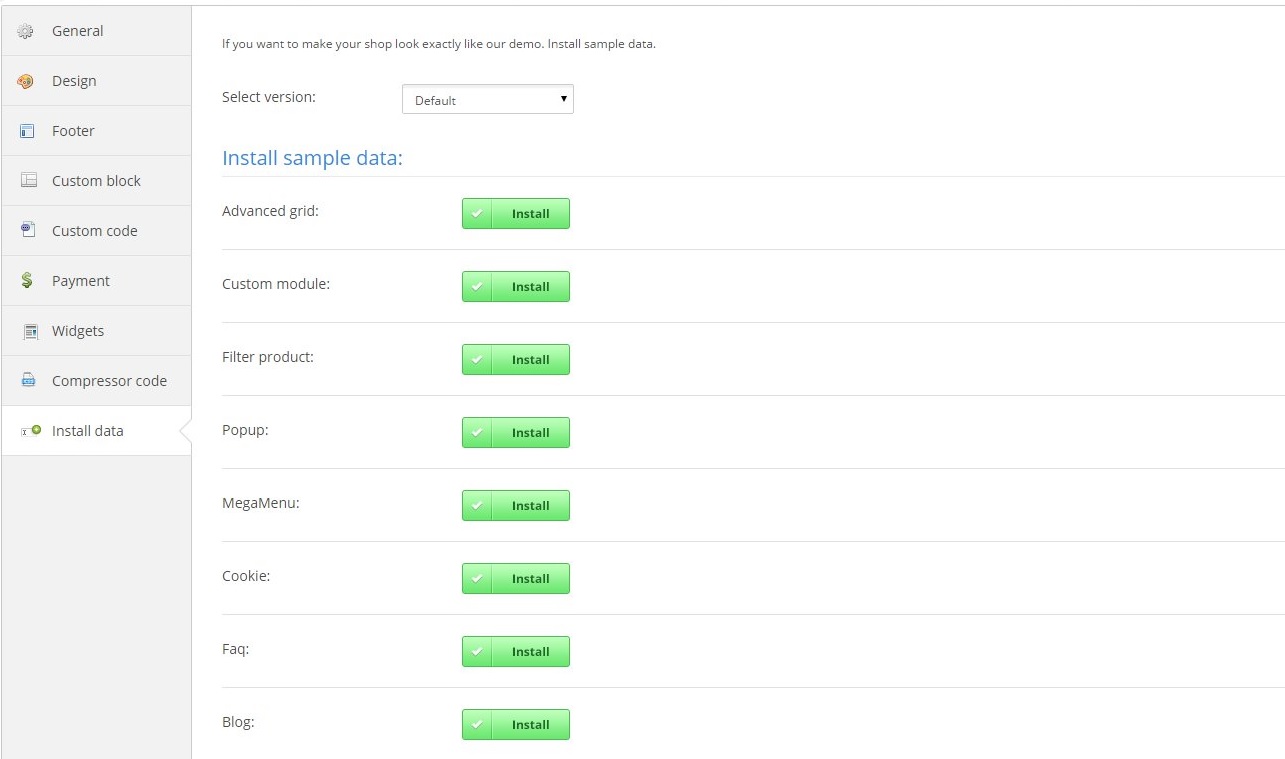
You have to Press Install button to install sample data each of listed modules.Once you install it your site should look almost identical as the demo version.
Layout
Logancee template has following type of layouts:

These positions are usually use in every module provided in this package. They are used to determine a position of content that you want to display on your site
Advanced Grid
Advanced Grid is sophisticated module, that allows you create various grids with custom templates and advanced configuration. There are several type of data that u can embed here:
- HTML
- BOX
- Links
- Products
- Newsletter
- Latest Blog
You can also load another module as the element of the grid. It is very easy and allow creating awesome advanced sections:

Example output:
Custom module
Custom module is helpful when you want to add any content (HTML) at any place on your site. To add a module press Add Module button. You can decide if the module will be displayed in the Block form (heading + content) or in the HTML form, where you can type own html code.
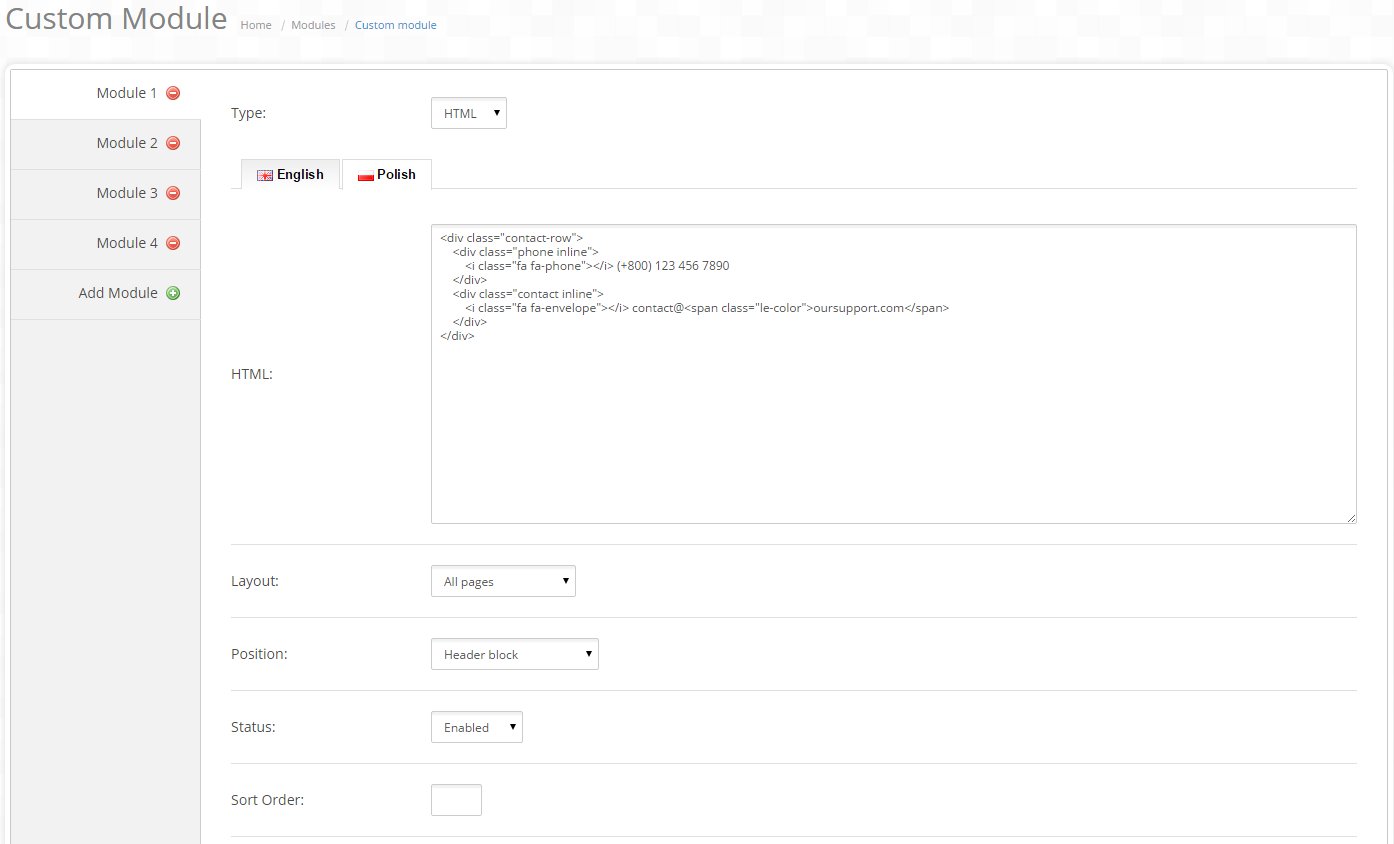
In the demo version this module was used to display banners and custom blocks. If you want the banners and the custom blocks to be displayed on your webpage in the same way as in demo version, go to the eidtion of Logancee Theme Options module, then to Install data bookmark and to the sign Custom module press the install button.
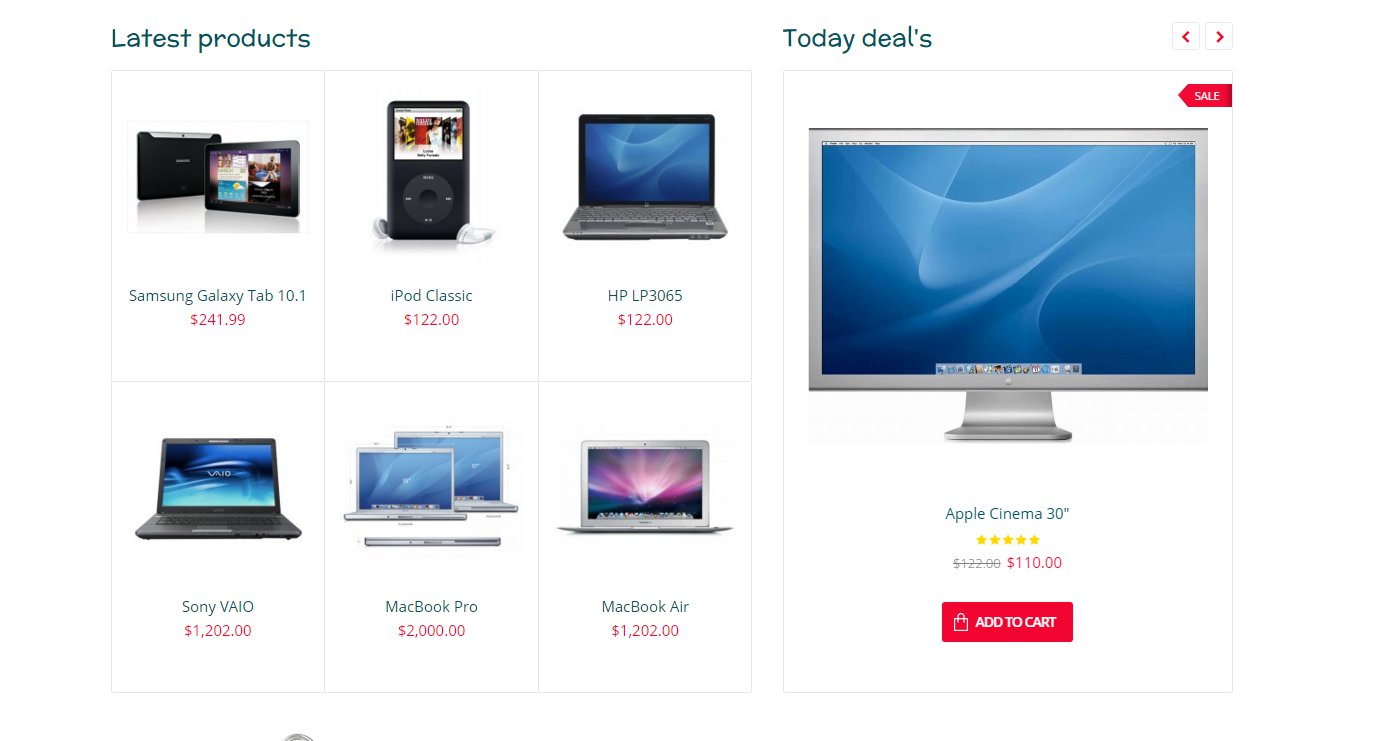
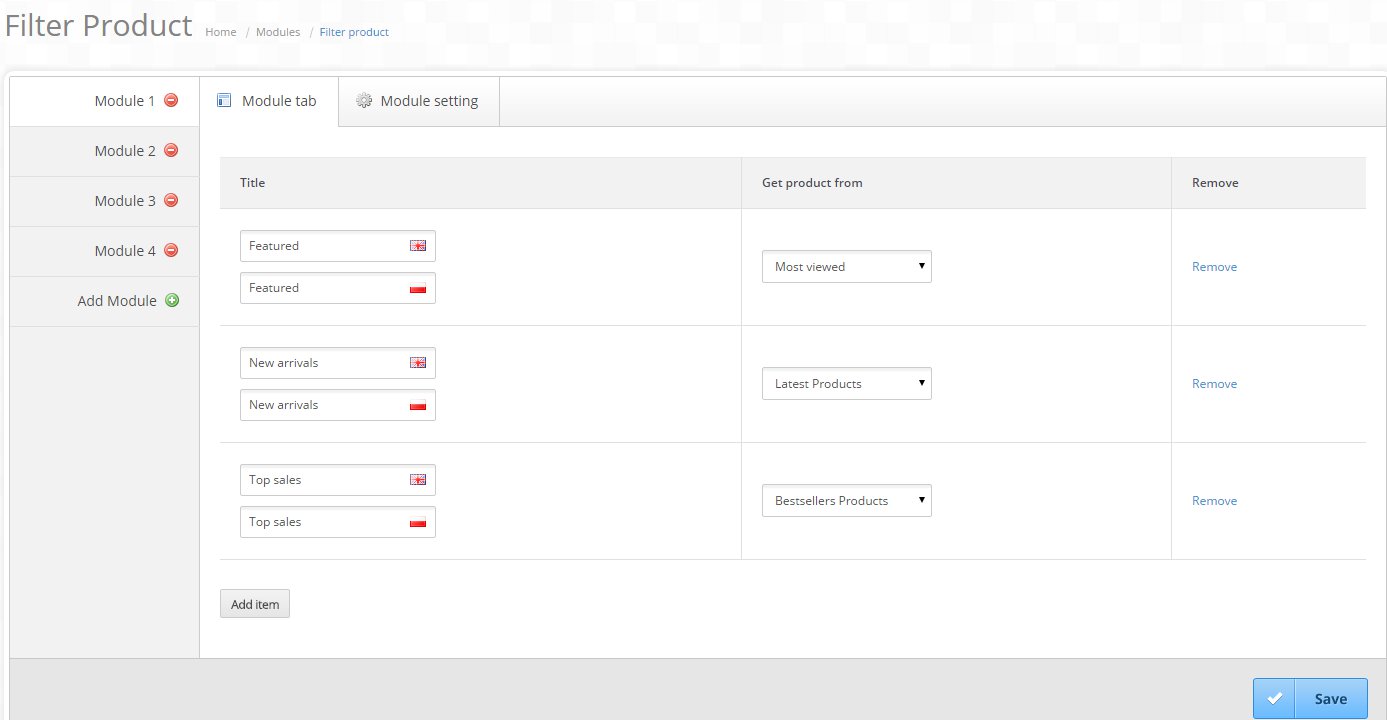
Filter Product
Filter product module allow you display any type of products at any place on the site. After click on Add module button in the Module tab bookmark you can add bookmarks and then choose a type of products.
Settings:

- Carousel – turn on or off product scrolling,
- Dimension (W x H) and Resize Type – you can set the size of product pictures,
- Max Items - Max Columns - Limit Items In Carousel – you can set the number of products in one row, the number of rows as well as the number of all products in a module,
- Layout – subpage where the module will be displayed,
- Position – position where the module will be displayed,
- Status – you can decide if the module is to be visible or not,
- Sort Order – here you can specyfic the order of displaying modules at this Position
Example:

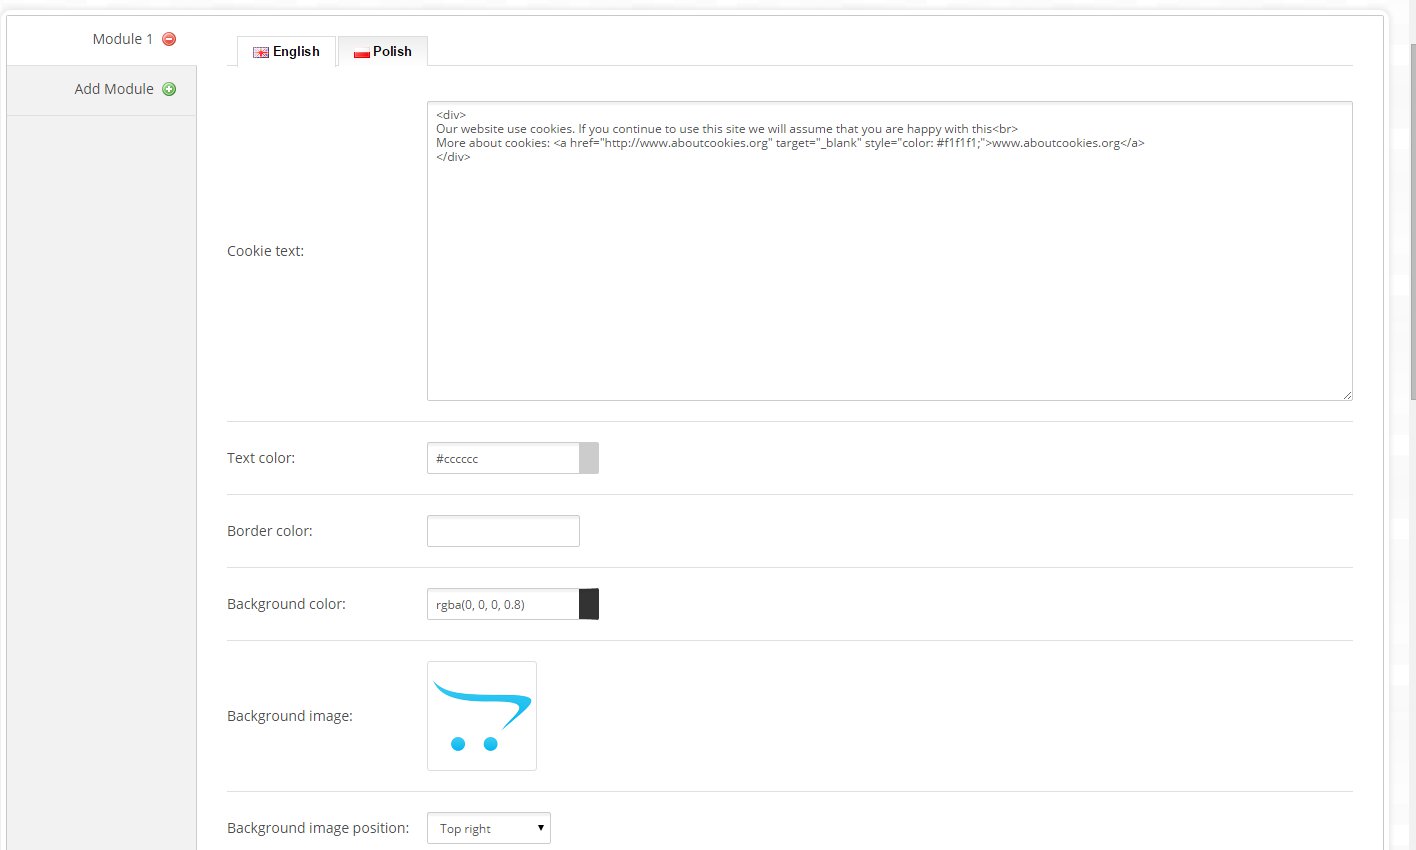
Cookie
Cookie module allow you to create customized section, informing users about cookie policy.
You can determine position where this block will be displayed (top, bottom), type text, customize background, borders, text color, layouts and so on.
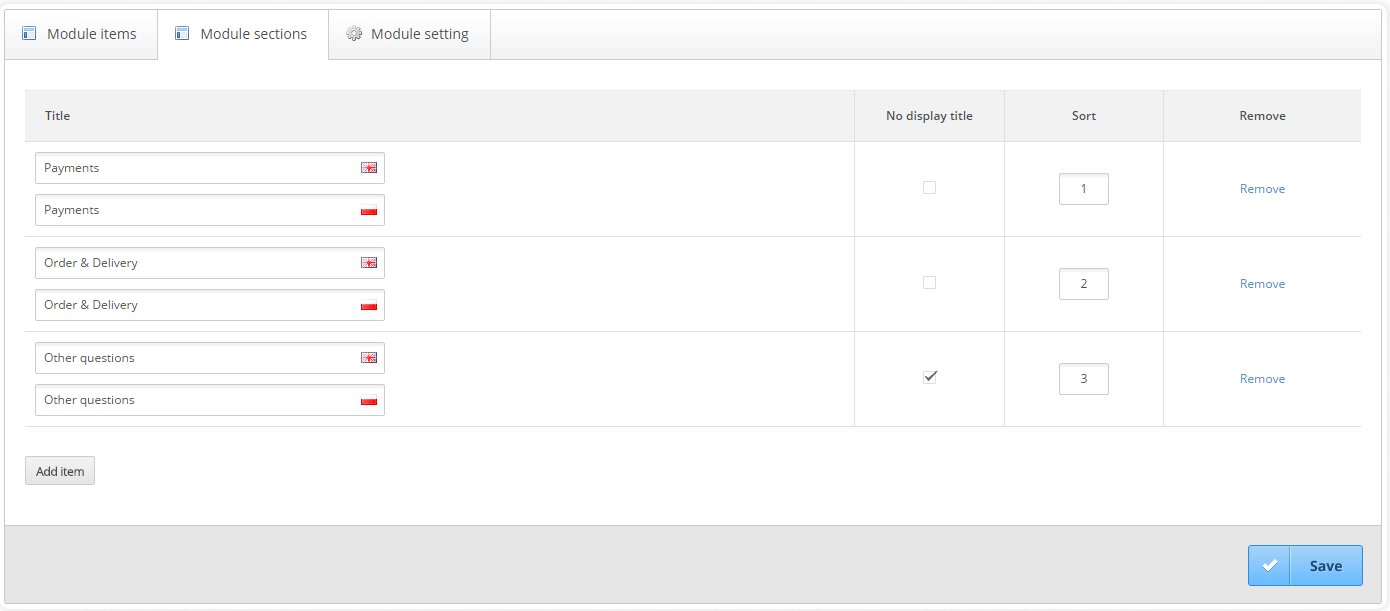
FAQ
FAQ module give you a possibility to create question and answer pairs which they want displayed on the 'faq' page.
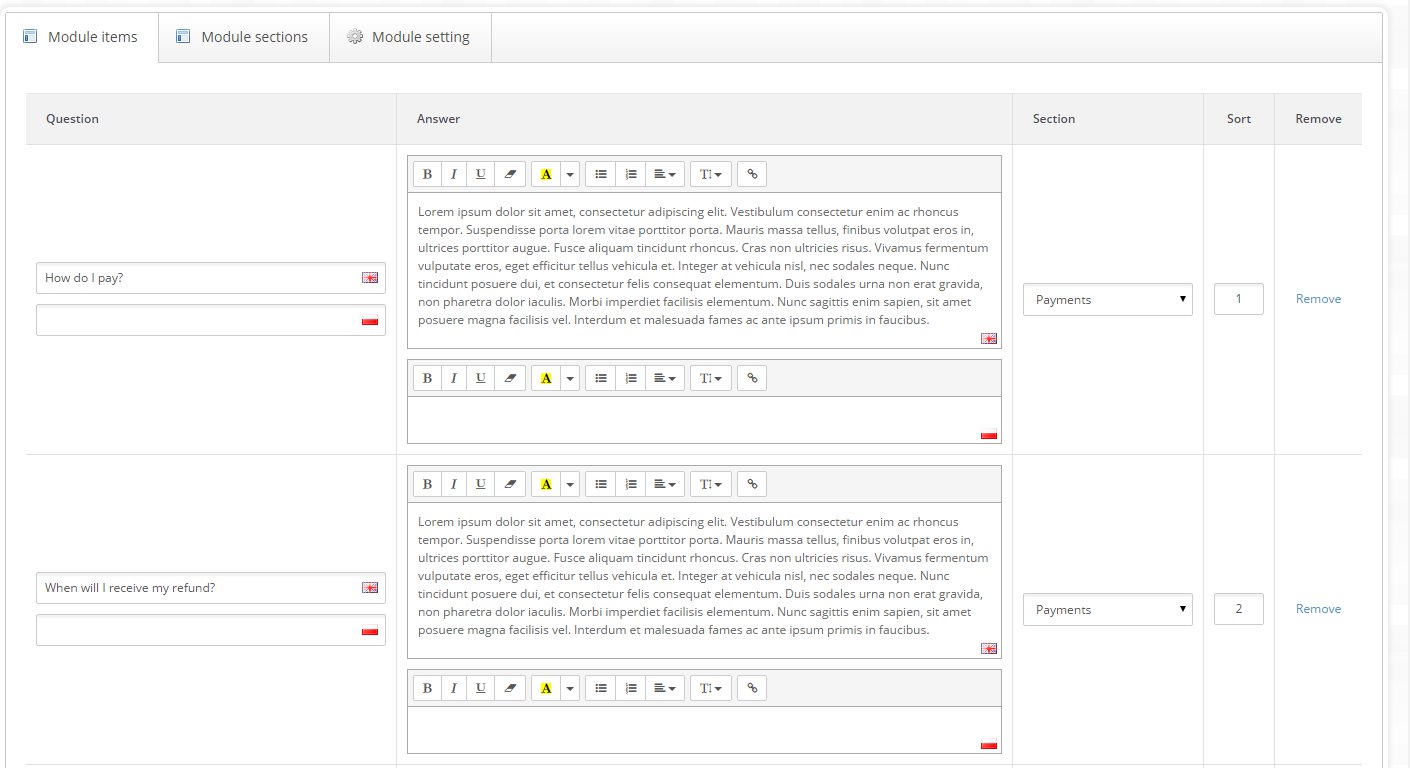
Moreover you can sort and categorize answers in different kind of section.
In settings tabs you can allow for all items to be collapsible or not:


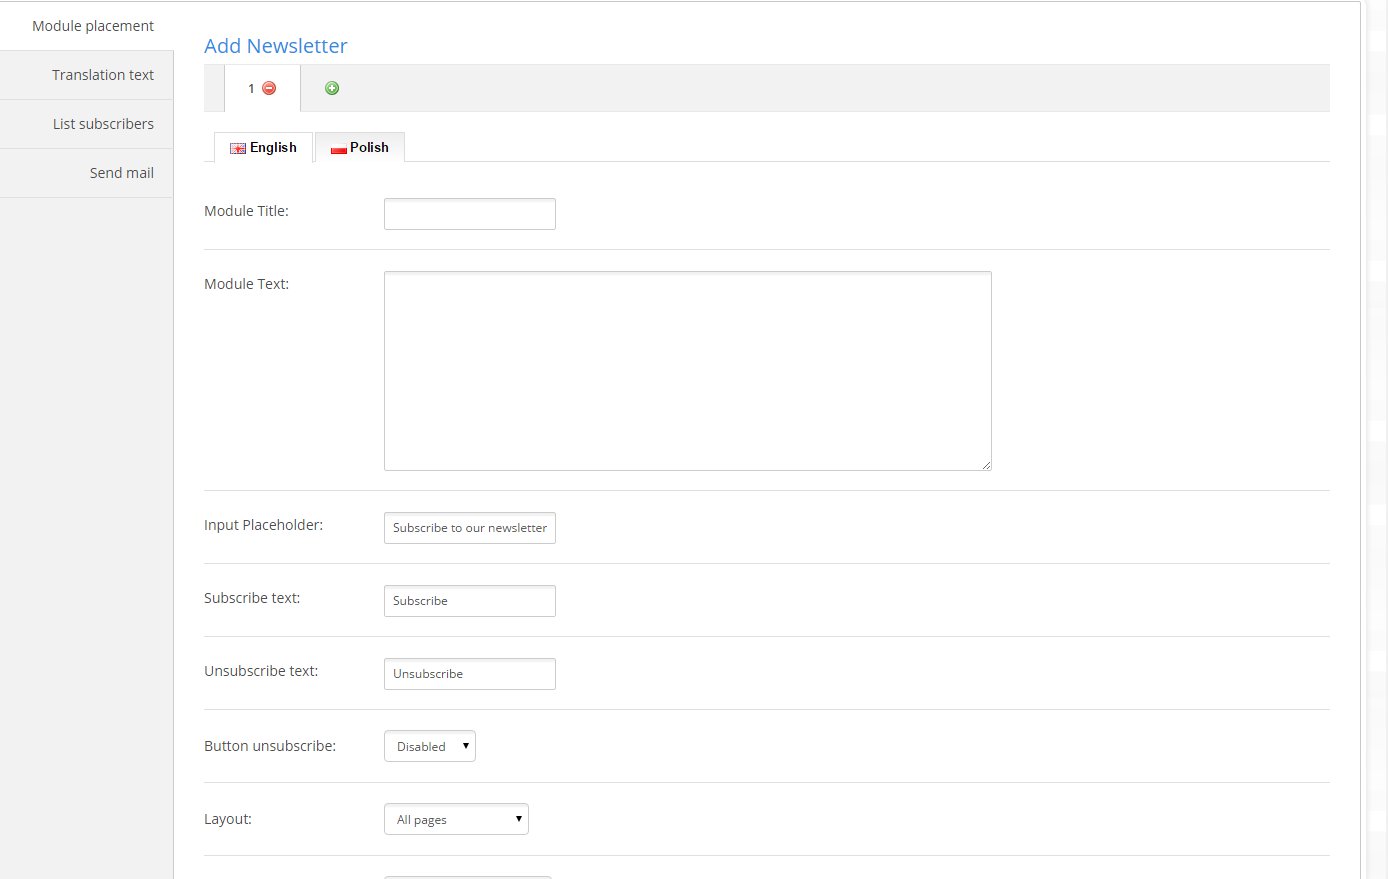
Newsletter
With this module you can manage list of subscribers, send mails and display section contains form which allows users to subscribe to your newsletter.
MegaMenu
Design configuration
-
Orientation - Choose the style of Mega Menu.
- Vertical - will be displalayed next to Slideshow (for example)
- Horizontal - will be displayed like in default skin in our theme. Of course you can change position of Mega Menu
- Search bar - Display serach bar on the right side of Mega Menu
- Navigtion text - Change name of this module in Vertical Orientatino
-
Expand menu bar Full Width
- Yes - Menu is full width in content.
- No - Menu is fixed in the content.
- Home item - Select between Icon, Text or Disable Home button in menu.
jQuery Animations
Item setting
- Name - Category name
- Description - Small text under Category name
- Icon - You can upload icon for category. Icon will be displayed before category name
- Link - url to category
- Link in new window - enable if you want to open url in new window.
- Position - Select where you want to have edited category should show. On left or right side.
- Submenu width - Width of submenu. You can use % of "px".
-
Display menu on:
- Hover - Default hover
- Hover intent - Opened for few seconds after hover over
- Click - Click to open submenu
Content item
- Content width - width of edited subcategory. 12 is full width 3/12 = 1/4
- Content type - choose what kind of content will be in this subcategory.
Header Notice
Header notice is simple and very handy module that allows you to create notice, which will be displayed for users in a header section. It offer a lot of configuration options, which let you customize appearance in many ways.

Example:

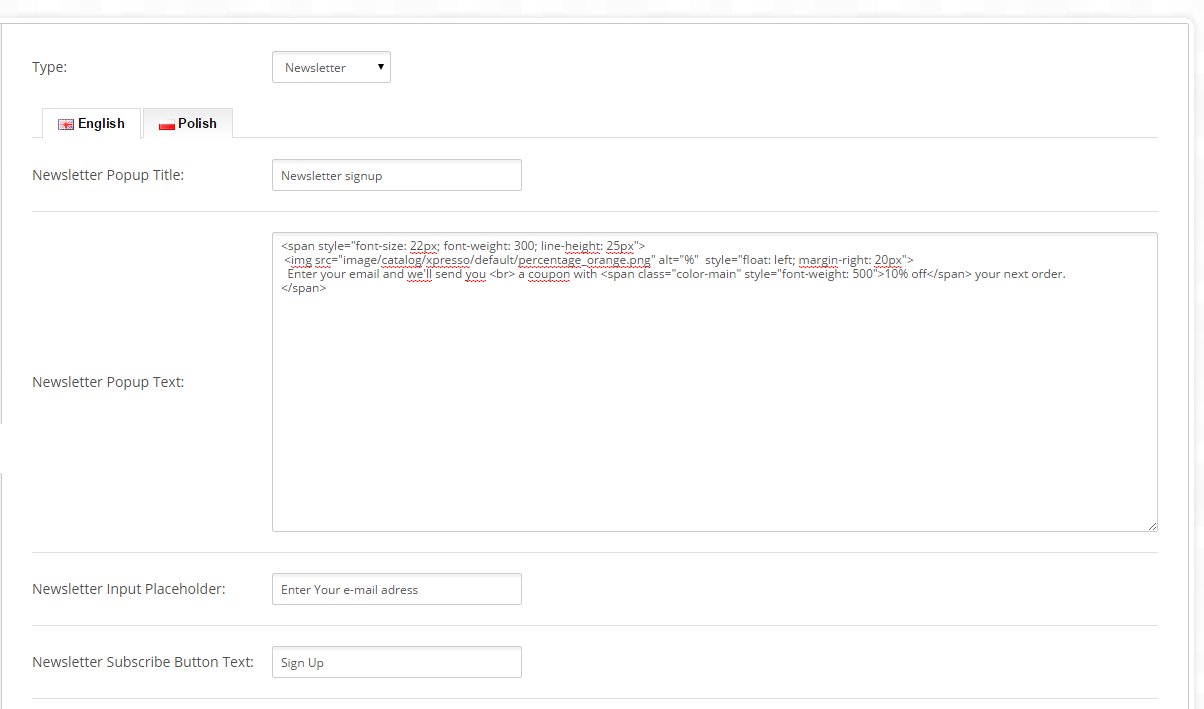
Popup
Popup Module allow you to create 3 types of popup:
-Newsletter - generate form which allow users to subscribe to your newsletter.
-Custom - optional content, you can type here whatever you want
-Contact Form - generate form, which allow users to contact you via e-mail
Product Question
Product Question module let you add a button in product detail page, which allow users to ask you about particular product. You can show this button in all products, only in chosen category or in selected individual products

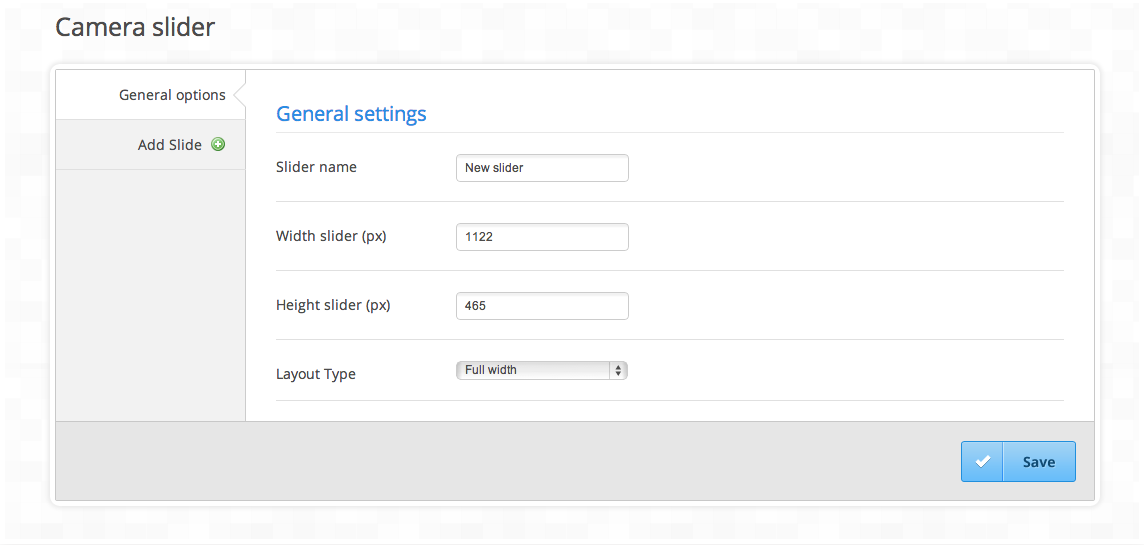
Camera slider
Slider operates on the basis of the same rule as a standard opencart. You can add unlimited number of sliders, insert unlimited number of photo there and place every slider at any place on the webpage. To add a slider go to the bookmark Existing modules. Then in the same bookmark press Create new slider button.

Complete the name, width and height of the slider and then decide whether slider is to be displayed within the whole width of the page or with the content of the page. Then press Add Slider button and upload the Picture. When you have a completed slider, press the save button.
In the Module placement bookmark you can place the sliders you have created at any part of the webpage. Press Add item and then choose slider, layout and the place you want the slider to be visible at. In sort order you have to type in a number higher or equal 0. The greater the number, the lower the slider will be displayed regarding the number of modules.
In the demo version this module was used to display the banners visible on page Category. If you want your webpage to look the same, go to editing Logancee Theme Options module, then to Install data bookmark and next to sign Camera slider press the Install button.
Revolution slider
This module has its own full detailed documentation. You can find it in catalog: documentation/revolution placed in this package.
Notice:
The package contain 4 sliders ready to upload. Edit revolution slider module and click button: "import"
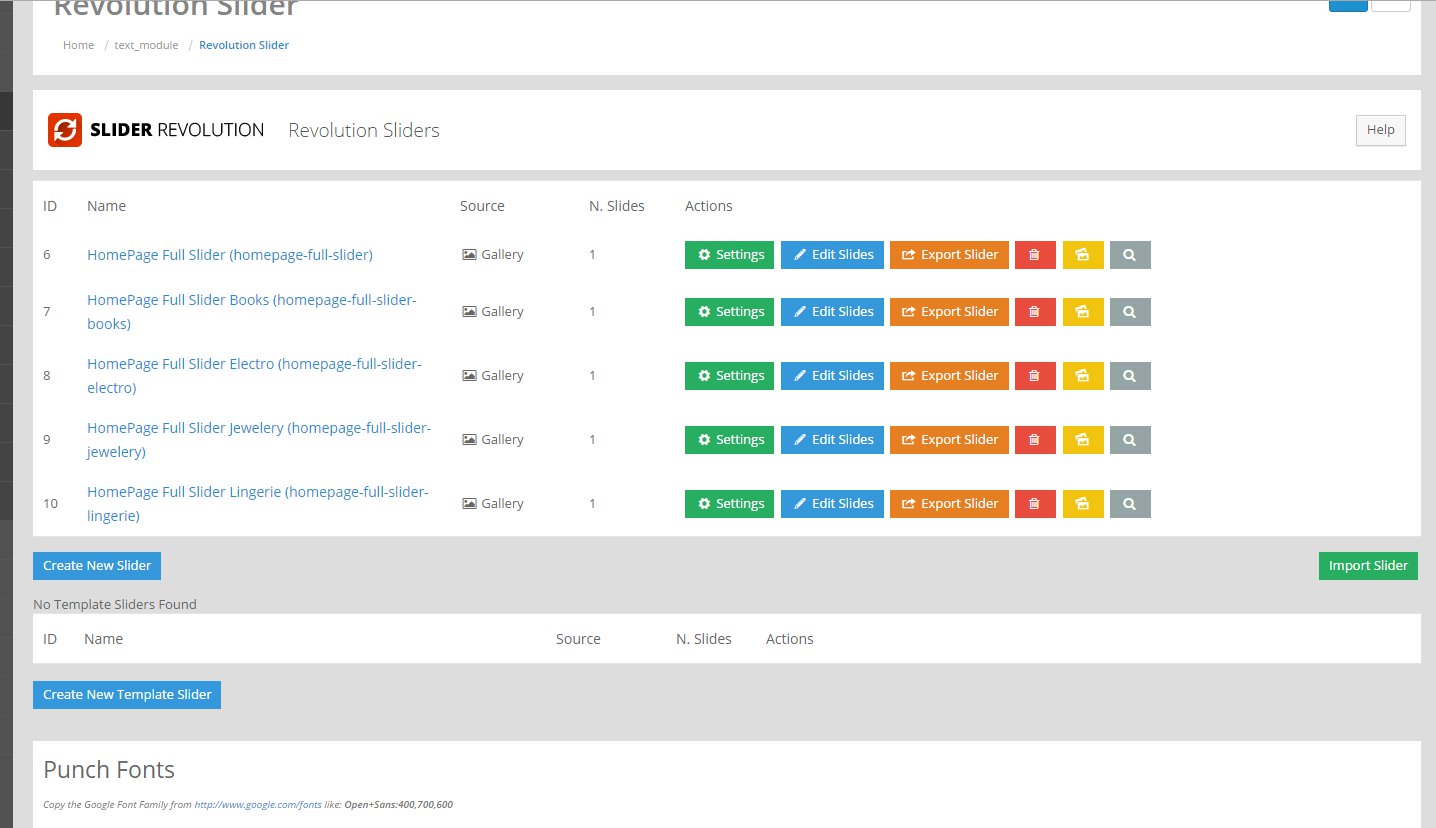
Next go to the catalog: Revolution Slider placed in the main folder in package and upload 4 files:
- home-boxed-sidebar.zip
- home-fluid-width-slider.zip
- home-interior.zip
- logancee-slider.zip
Once you upload mentioned files go to the Revolution slider output module and configure it as presented below:

Switching status of these sliders you can decide which slider (full or boxed) will be displayed on the homepage according to which the header is selected.
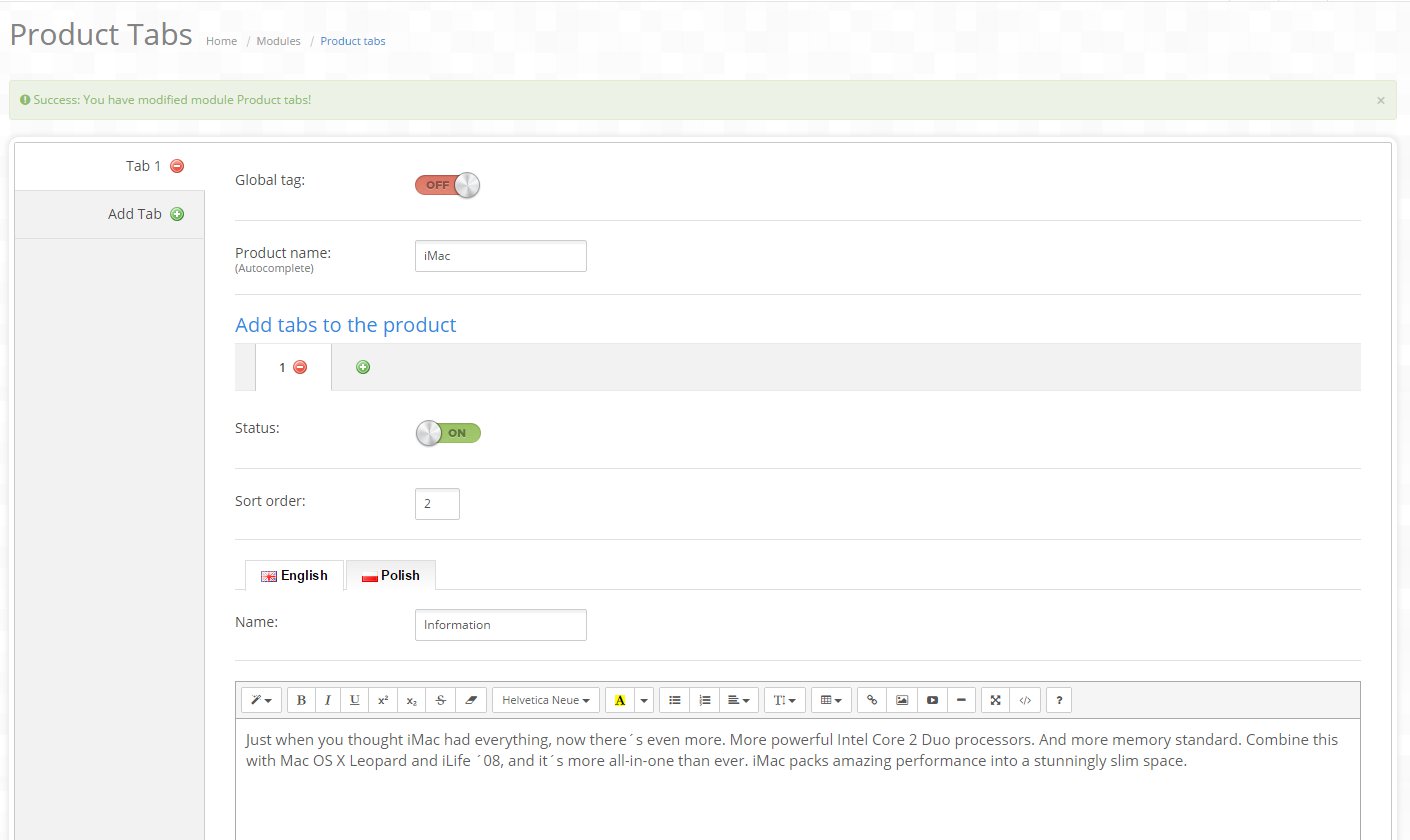
Product Tabs
This module enable the creation of unlimited number of bookmarks on the product webpage. Go to editing the module and press Add Tab button. Choose if you want the bookmark to be displayed on all products or Only on a chosen product. Type a product name in the Product Name field to select it from your catalog. Proceed to add any custom html content to that particular tab.
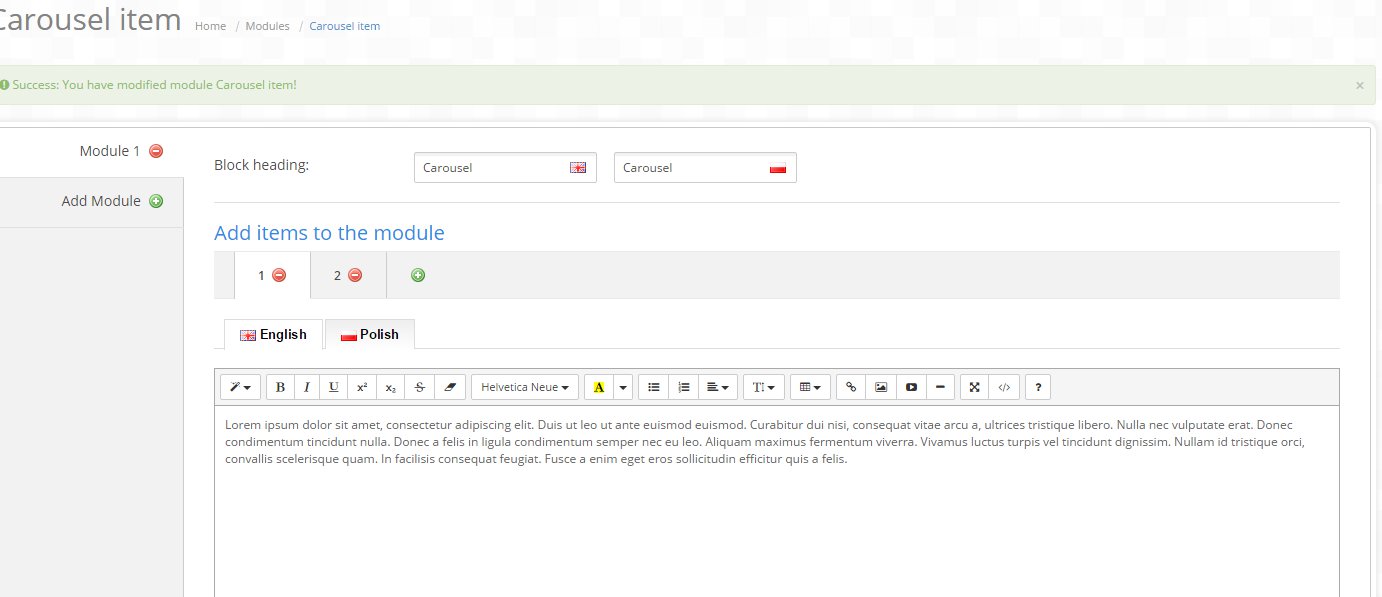
Carousel item
An additional module that allows you to add any HTML content in the carousel form anywhere on the page.
Mega Filter
There is a mega filter in the demo version. If you want to locate a mega filter on your webpage, you need to purchase the following module:
http://www.opencart.com/index.php?route=extension/extension/info&extension_id=19235
You don’t have to worry about adjusting the module, after correct installation your module will look exactly the same as in demo version.
Blog
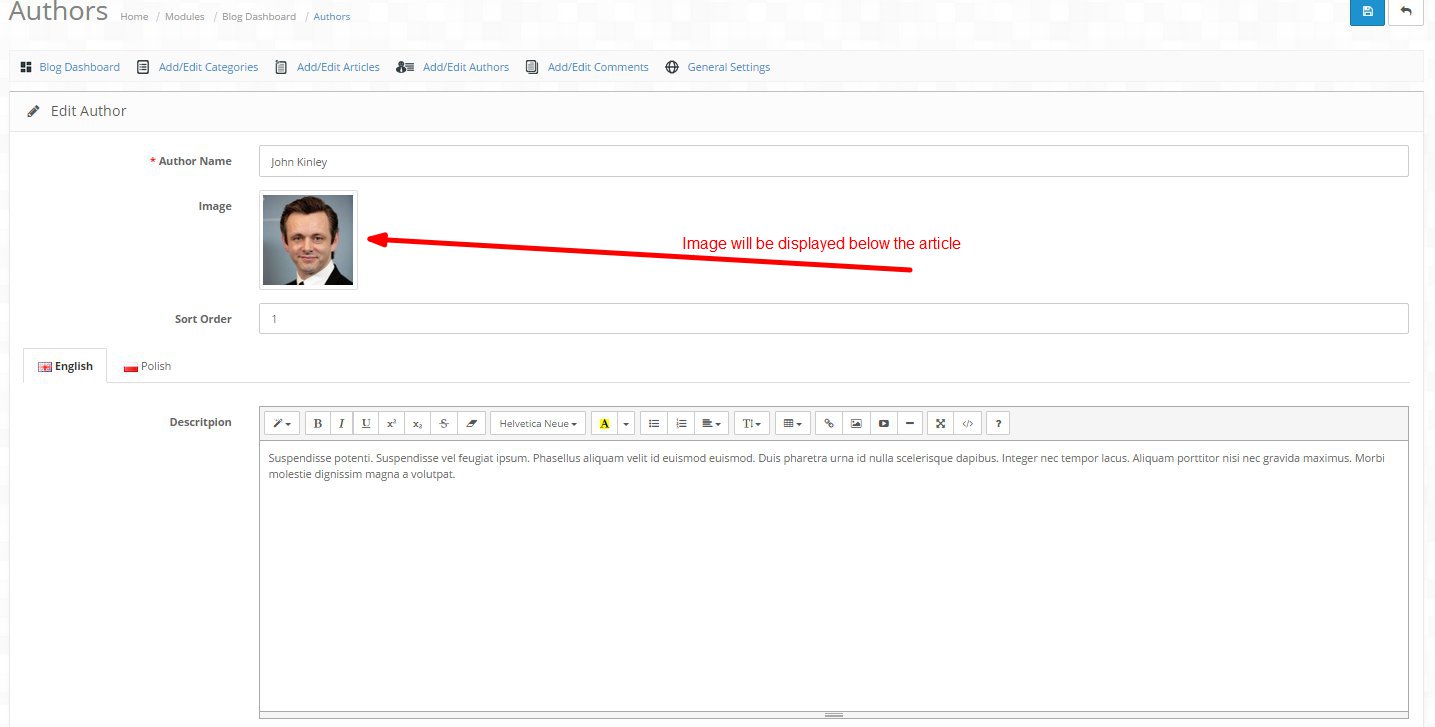
Blog is powerful module, allow you add articles, categories, manage autthors and moderate comments. Moreover it give you advanced configuration to customize its features in many ways
Blog module consist of
- Blog Management - main module where you can manage everything
- Blog Category - display list of availables categories
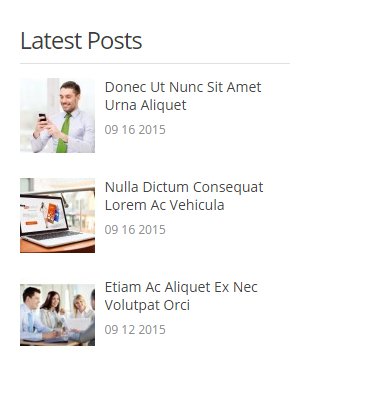
- Blog Latest Posts - display list of latest articles
- Blog Popular Posts - display list of popular articles
- Blog Popular Tags - display tag cloud with popular tags
- Blog Product Related Posts - display list of articles in product detail page
- Blog Search - display form, that let users search articles, which they interested in
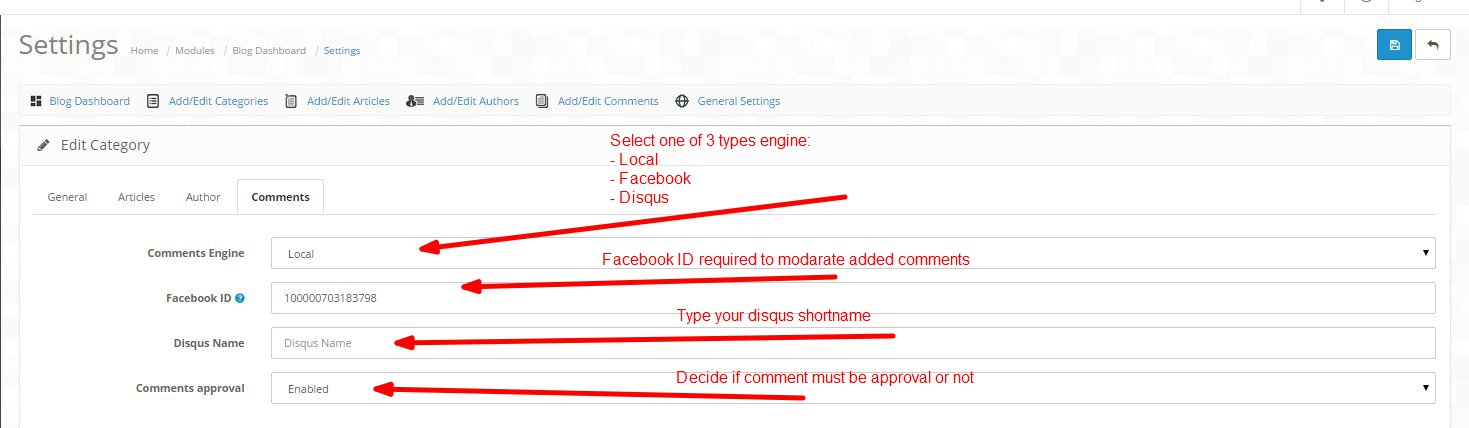
BLOG MANAGEMENT
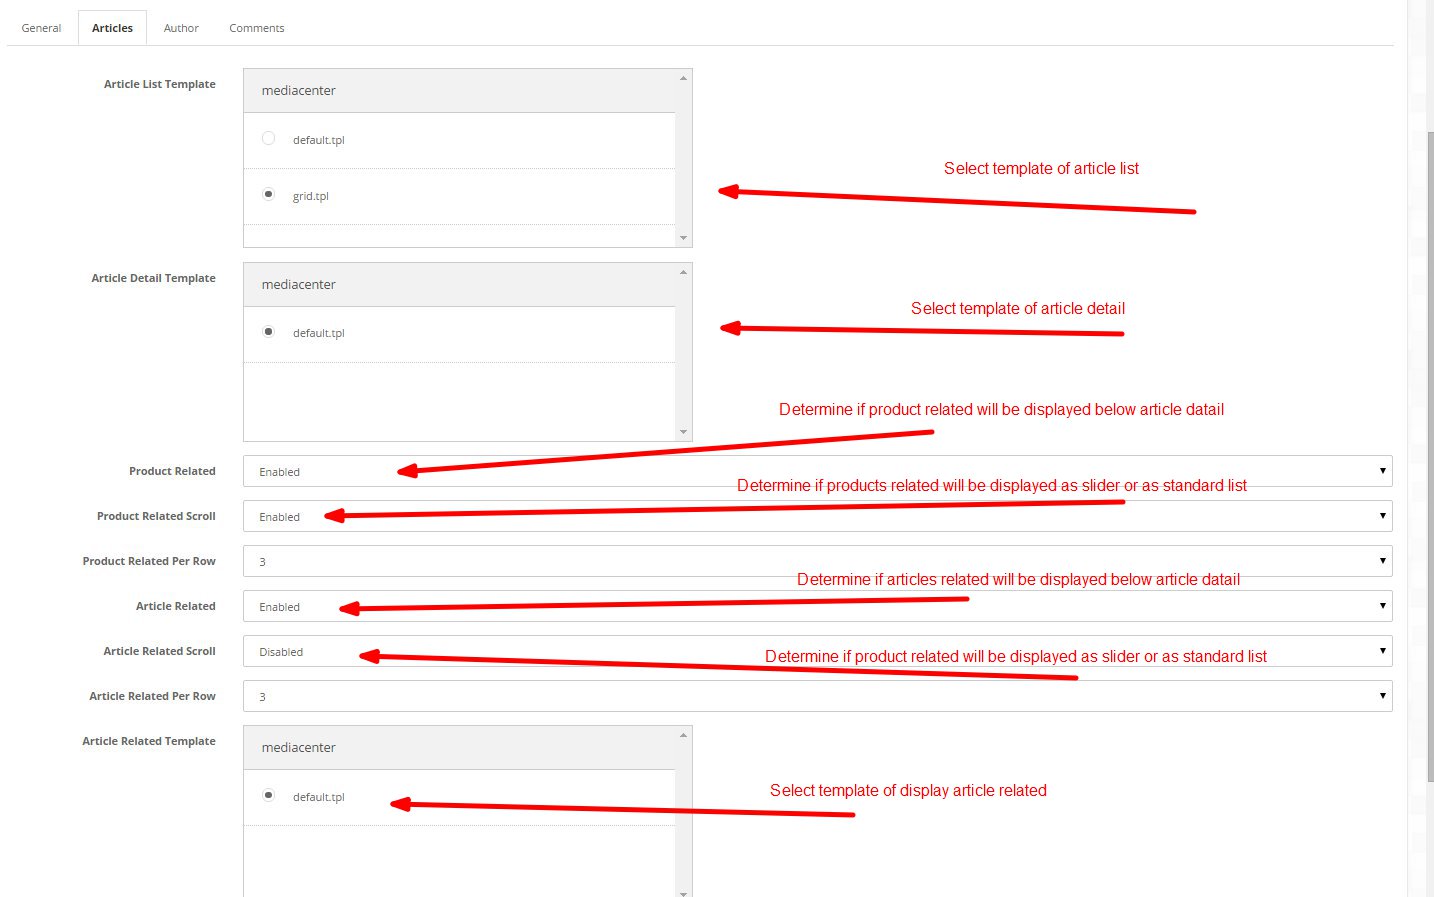
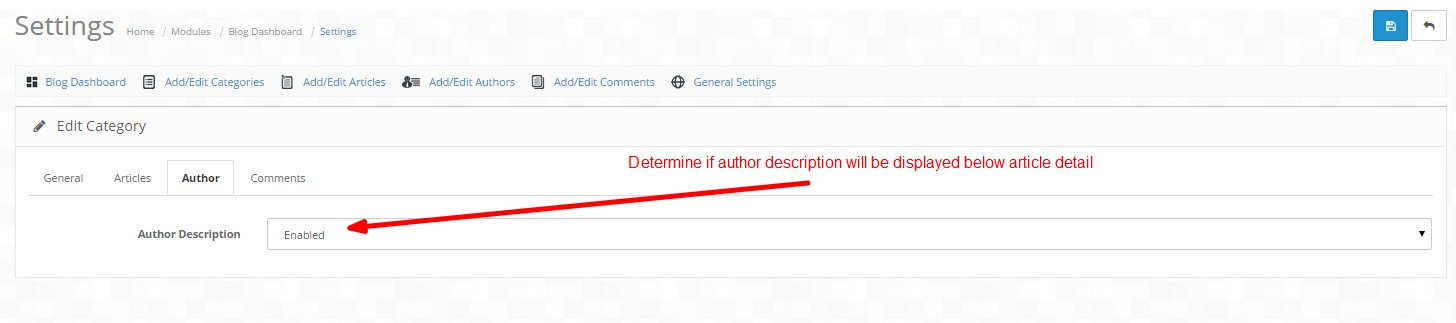
It is a main module where you can manage articles, categories, authors, settgins and moderate comments.

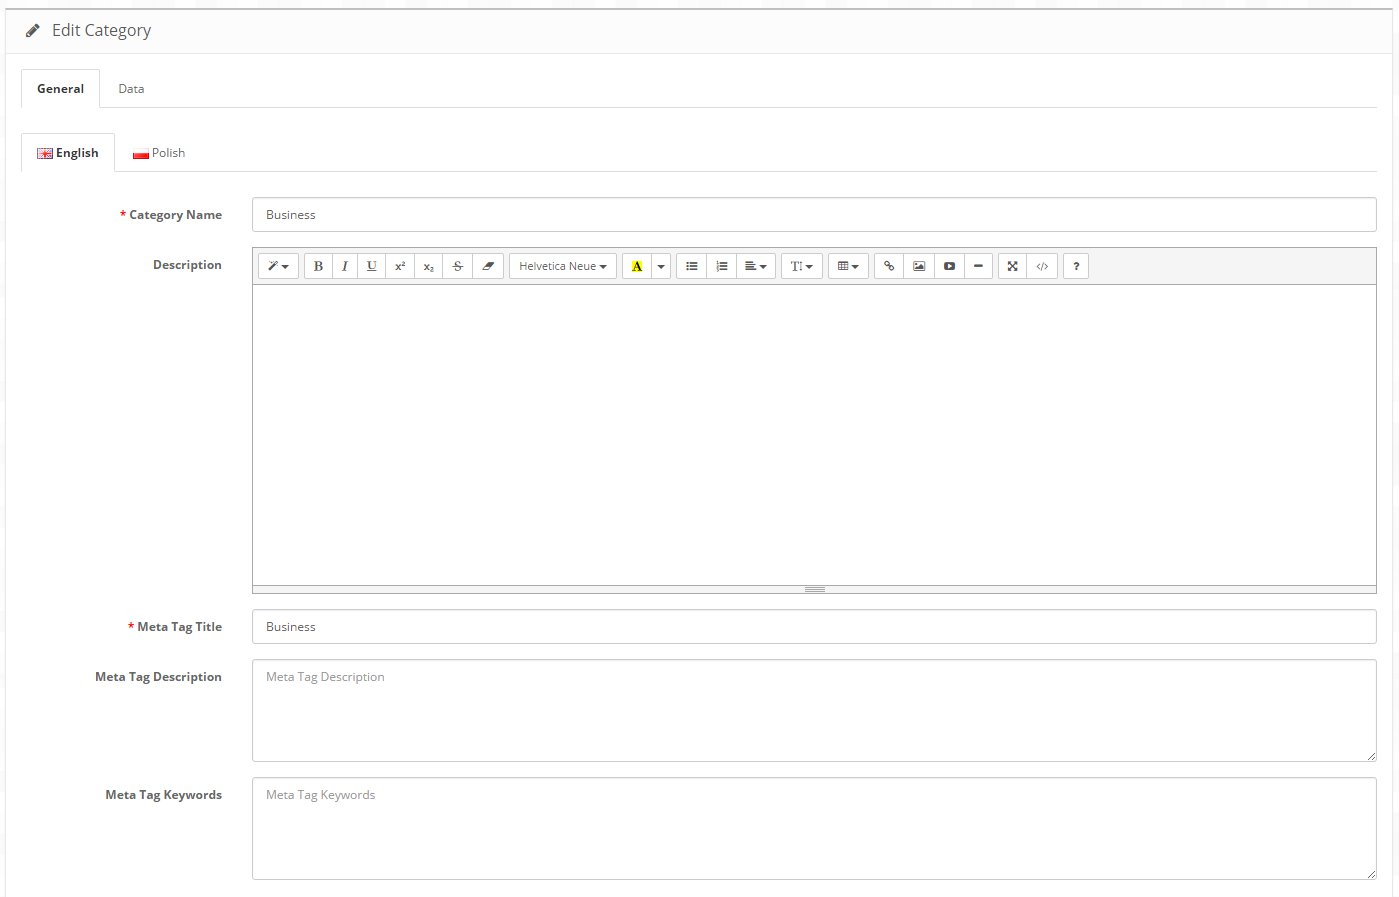
Add / Edit Categories:
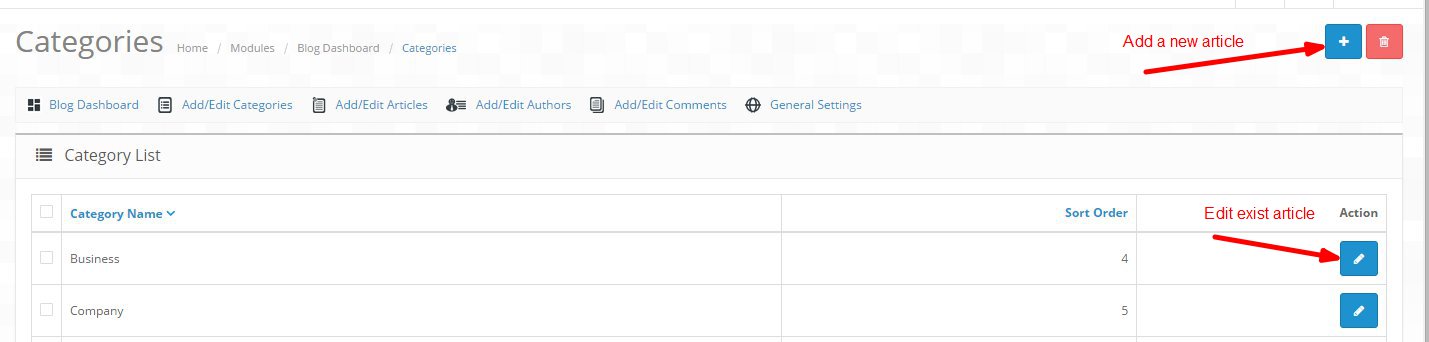

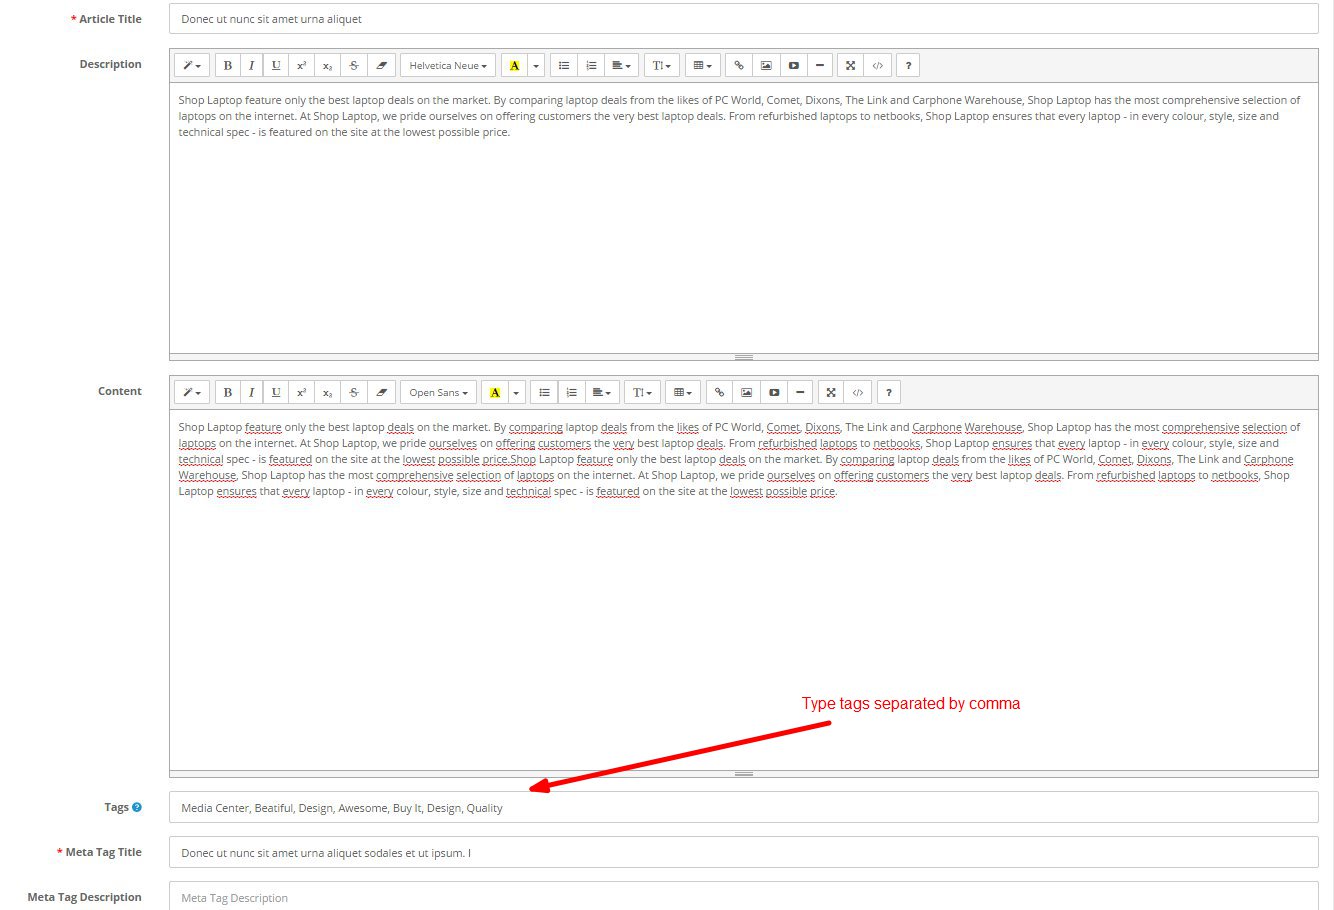
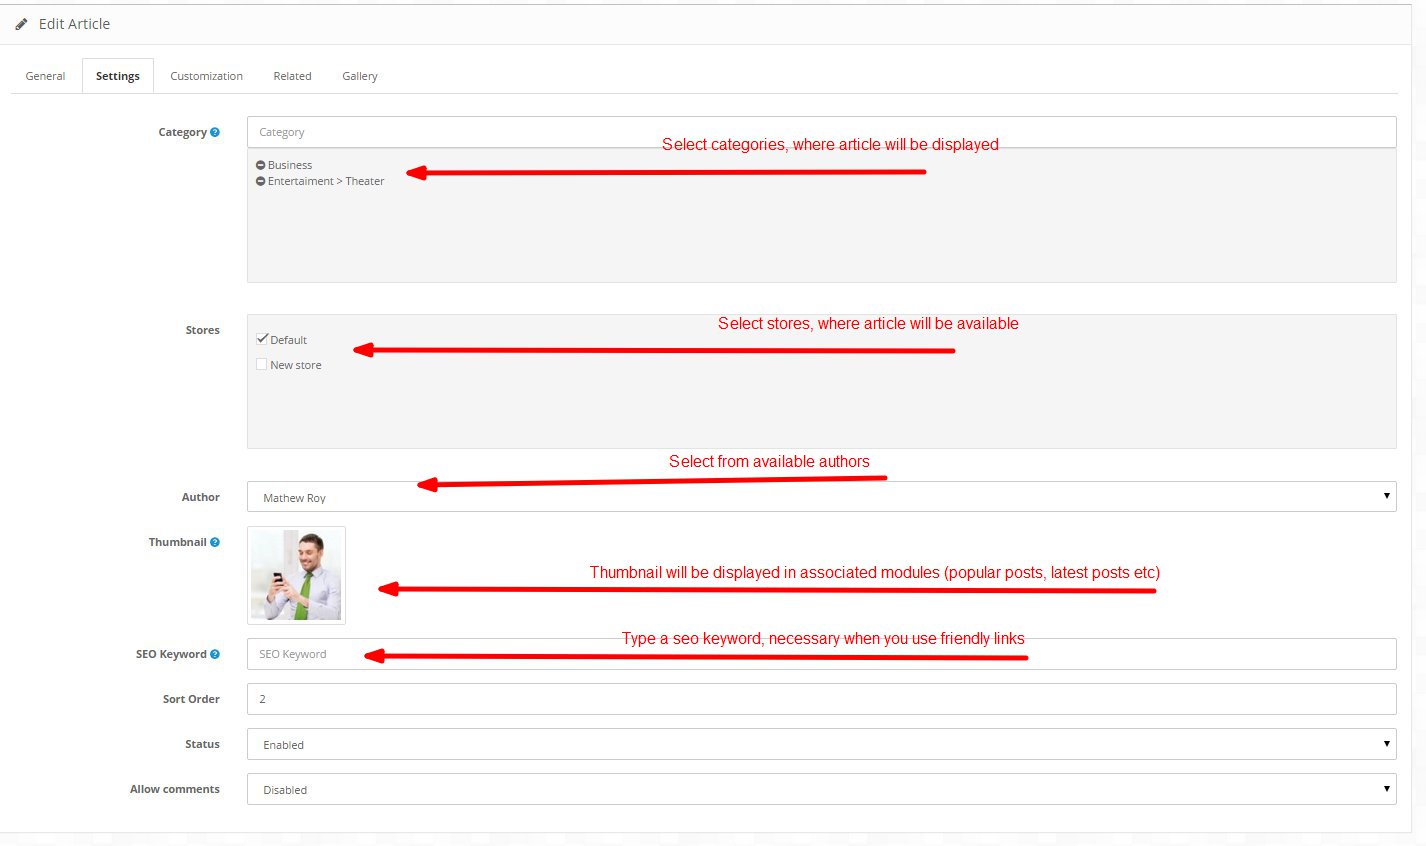
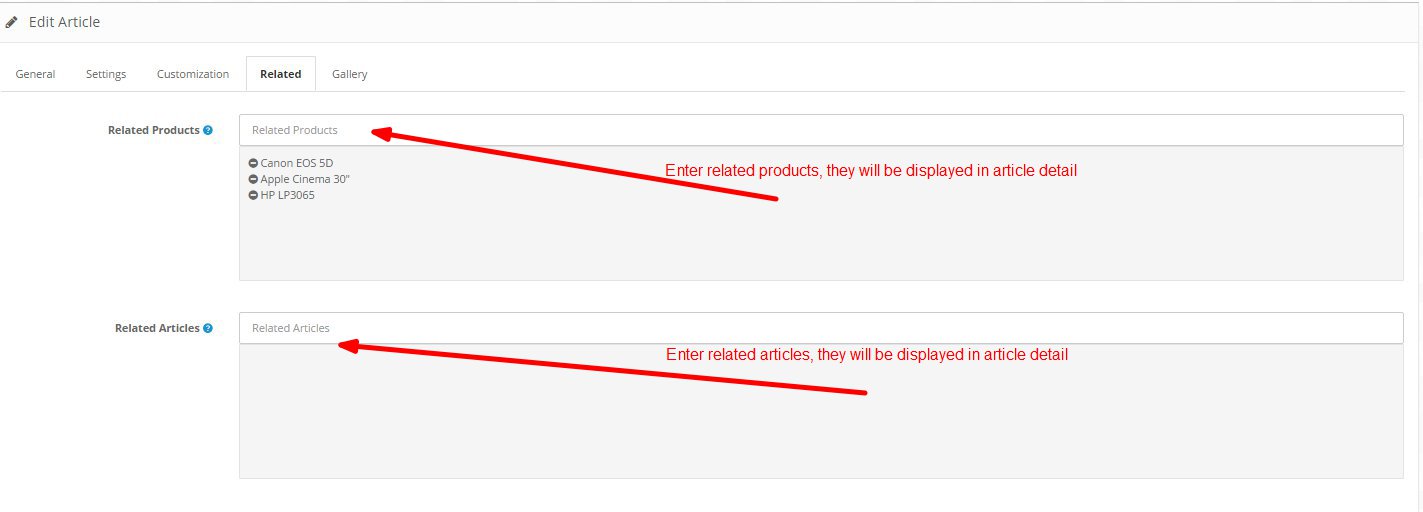
Add / Edit Articles


BLOG SUBMODULES
- Blog Category:
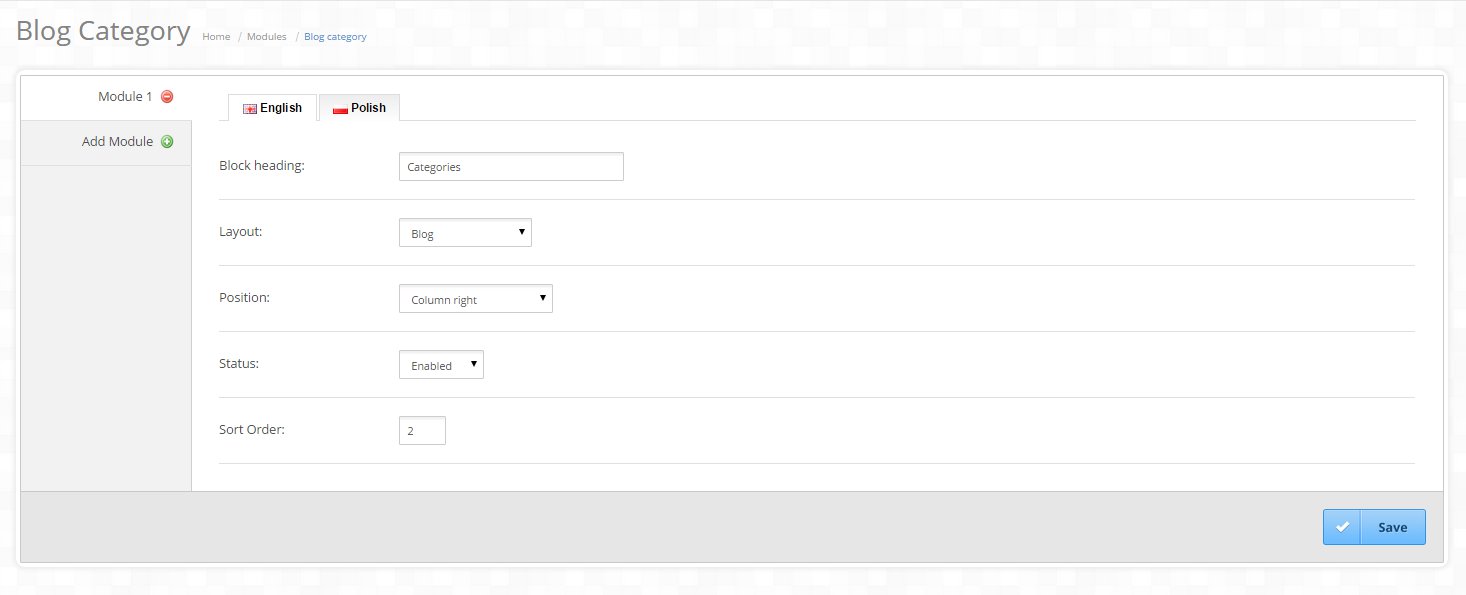
Example:

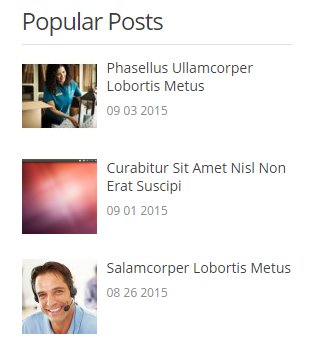
- Blog Popular Posts:
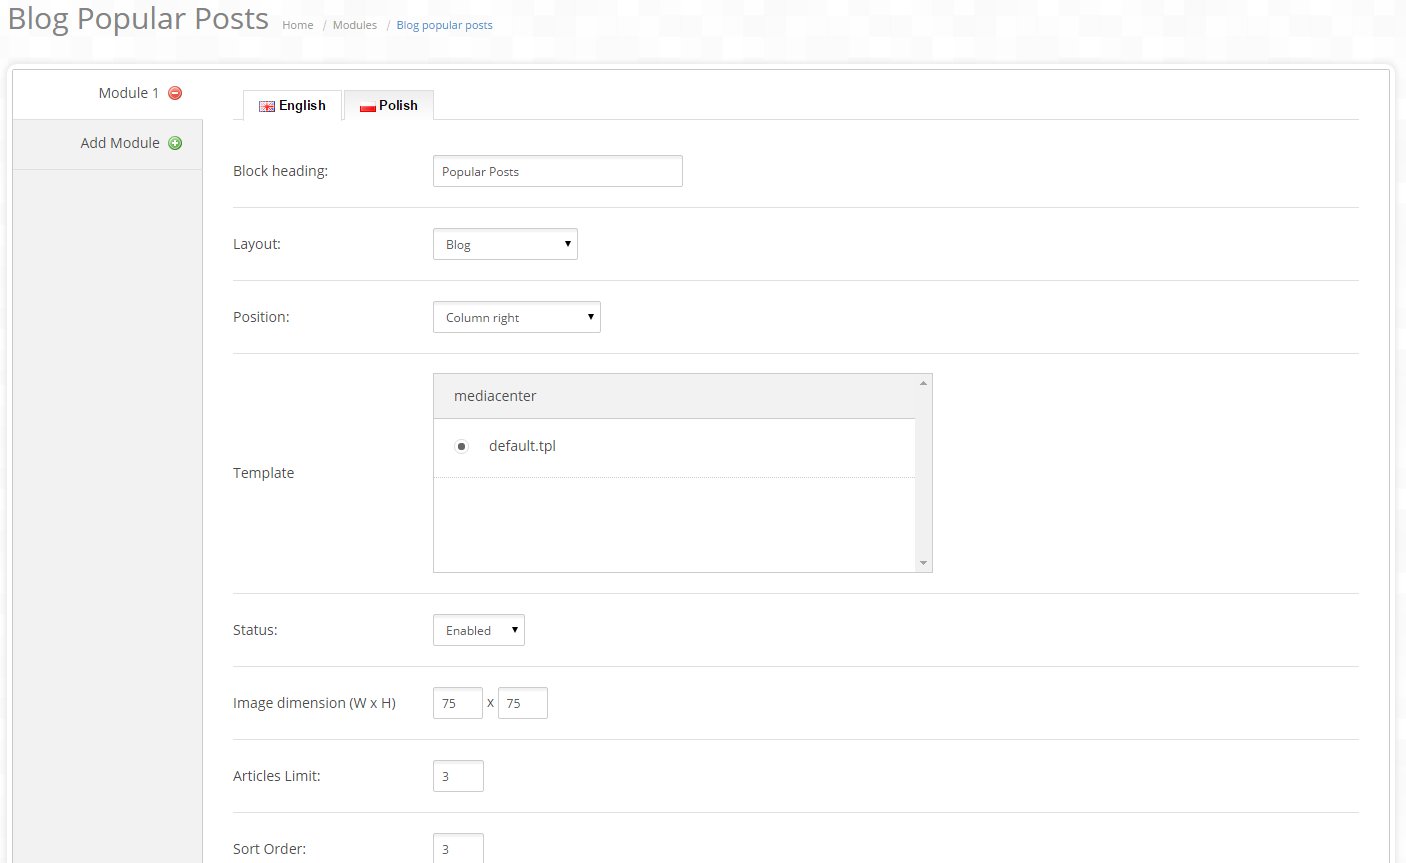
Example:
- Blog Latest Posts:
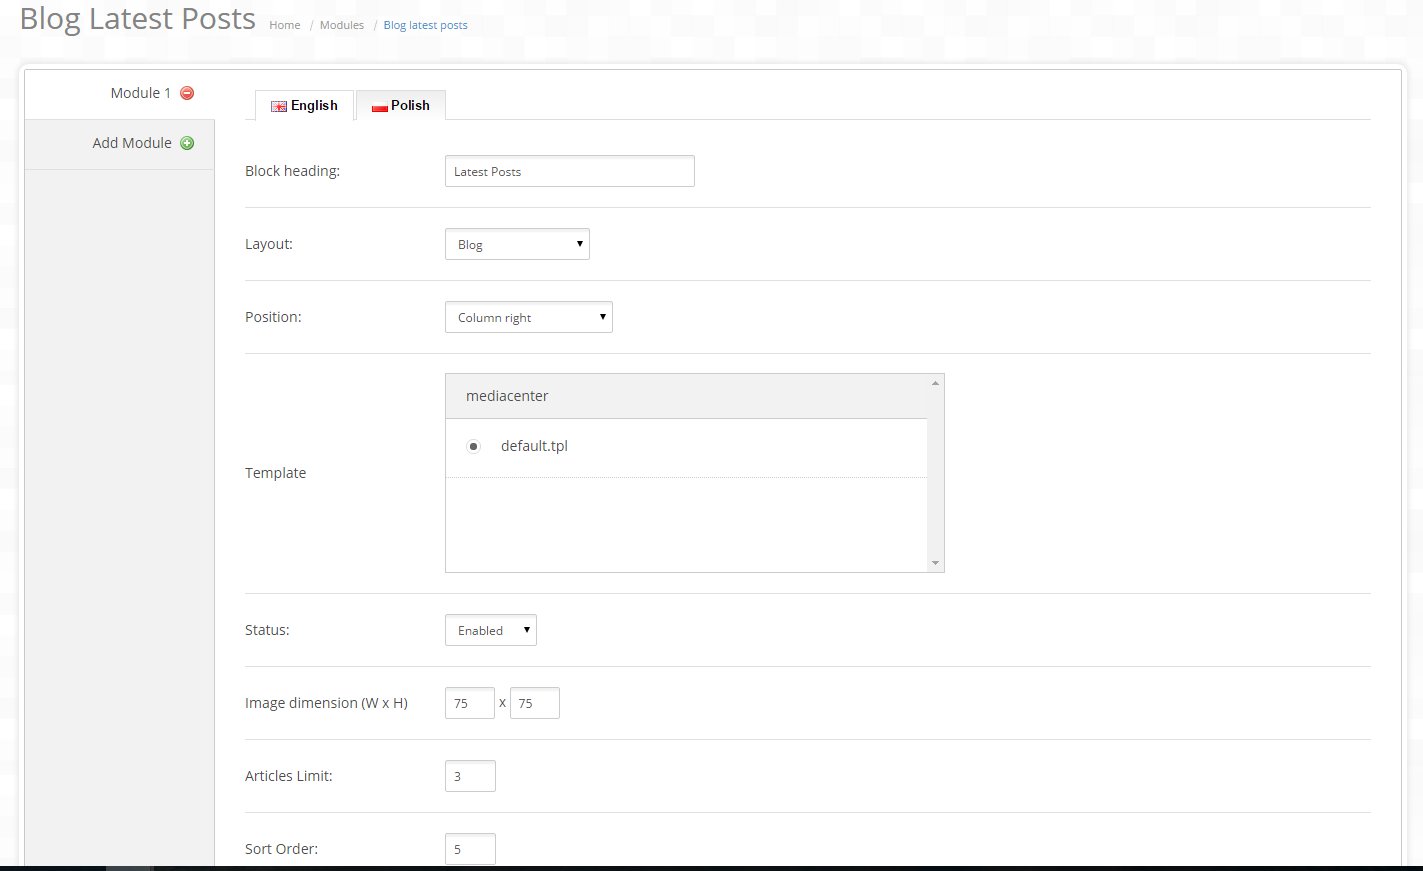
Example:
- Blog Popular Tags:

Example:

- Blog Product Related Posts:

Example:

- Blog Search:

Example:

BLOG ENABLE SEO
Enter Keyword Using In SEO URLs
- Category Form- you enter keyword using for for category
- Artcile Form- you enter keyword using for for article
If your project was modified Opencart SEO, you must make sure that which file is proessing SEO function. Example it is processing in catalog/controller/common/seo_url.php do implement code as following:
Video documentation
GO TO VIDEO TUTORIAL